Pints for Prostates

Thursday, March 29, 2012

Late Summit

My latest brew is an American Brown Ale called, "Late Summit" because I added an ounce of Summit hops late in the boil (i.e., a late hop addition). Summit hops are high alpha hops. In fact, the pellet hops I used are 17.9% alpha. Summit hops are a "super-high alpha dwarf variety grown on low trellis systems in Yakima valley" (source). They are known for having a funky, earthy, tangerine character. I'm hoping for kind dankness, tangerine, and citrus flavor.
In the Morning
Brew Date: 2012-03-27
Recipe Name: "Late Summit" (based on Jamil's "Dirty Water Brown")
Beer Style: American Brown Ale
Batch Number: B6

Recipe Original Gravity: 1.048
Recipe Final Gravity: 1.011
Expected ABV: 4.9%
Anticipated IBUs (bitterness): 36-38
SRM (color): 20
Expected Efficiency: 70%
Calculated Brewhouse Efficiency: 73% (using 6.5 gal for wort volume)

Yeast Starter Size: 2 liter
Water Volume: 2 liters
Dry Malt Extract: 200 grams
Yeast:
White Labs WLP001 California Ale Yeast 

Grain Bill
10 lb Canadian Two-Row
.5 lb Crystal 40L
.5 lb Chocolate Malt
.75 lb Crystal 60L
.75 lb Victory
Everything but the Kitchen Sink
Brew Day Start Time: 3:15 PM
Music: Grateful Dead - Dick's Picks 14 - Boston Music Hall, 1973-11-30 & 1973-12-02

All the water used for this beer is straight from our tap. We have well water and the pH is between 6.5 and 7. My understanding is that the darker malt will bring the pH down toward the 5.2 range, which is ideal.

Mash
Strike Water Volume: 4 gal
Strike Water Temperature: 165 F
Rest Temperature: 152 F
Rest Time: 60 min 
Brown Vorlauf

Sparge #1
Sparge Water Volume: 2.5 gal
Rest Temperature: 170 F
Rest Time: 5 min

Sparge #2
Sparge Water Volume: 2 gal
Rest Temperature: 170 F
Rest Time: 5 min

Pre-Boil Gravity: 1.044
Pre-Boil Volume: ~ 6.5 gal
Boil Time: 60 min
Rolling Boil
Hop Additions
10 grams Horizon @ 60 min
1 oz Amarillo @ 15 min
1 oz Summit @ 5 min

Yeast Starter and Hops
Actual Original Gravity: 1.050
Brew Day End Time: 7:32 PM
Fermentation Temperature: 64 F
It's taking off! Thursday night (29th)
I'm excited about this beer. Everything went really smooth during the brew day. My starter ramped up nicely. My gravity readings were fairly close to Jamil's recipe. I'm also excited about the hop additions. What makes this brew particularly enjoyable is being able to see the beer as it ferments in my clear, Better Bottle carboy. This is the first time I can see the fermentation process. The whole thing is alive with yeast cells. I check on it every morning and first thing after work...and after dinner...and before bedtime.

Tuesday, March 20, 2012

Water Quality Test Kit

The biggest ingredient in any beer is water. Having the right water chemistry is important. Until now I have not focused on it. I know it's important, but I have focused on other, more basic aspects. I wasn't quite ready to geek out on this so very science-oriented aspect. Remember, at heart, I'm that English major in the corner of the coffee shop reading Kerouac's Dharma Bums.

I had thought that John Palmer's book on water was going to come out soon, but I heard that it has been pushed back to this fall. I figured that book would be the perfect guide for diving deep into water matters. As it is, I can't wait until fall. Now that I am all-grain brewing, water pH is important. I need to figure out what I'm dealing with. Up until now I have purchased spring water at the grocery store to supplement my own well water. Reverse osmosis (RO) water does not have the minerals that the yeast need, but the gallons of spring water are fine.

Our well water runs through a filter that removes any debris, and then into a water softener. Our water tastes good. And for extract brewing, that may be enough. But for all-grain brewing, I need a better understanding.

Even though John Palmer's book on water is not out yet, his book, How To Brew is still considered the best source for information on brewing water. I'm using that for now.

This last weekend I was at the hardware store I found this water quality kit from Whetk. I knew it would not give me all the data I want, but for $10, it' a start. 
Whetk Water Quality Test Kit
Eventually, I'll send a sample to Ward Laboratories. They provide a home brewers test package. They send you a water bottle and return packaging. You take a sample and mail it back. They make it simple and it costs $33.
Kit Contents
The kit I bought comes with various strips, tablets for the iron test, and a sample vial. I just had to fill the vial with water from the tap, stick the various test strips and compare the strips to the charts.

The results are as follows (to the extent that I could match the test strips and the colors on the charts):
  • chlorine: 0 ppm
  • alkalinity: 120 ppm?
  • pH: 6.5 or 7
  • hardness: 0 ppm
  • nitrate: 0 ppm
  • copper: 0 ppm
  • iron: 0 ppm
Those results appear to be good. For general everyday cooking use and drinking water in the home those results are great. 

I'll want to bring the water pH down for my mash. Palmer's book says that you want between 5.1 and 5.5 (when measured at mash temperature). His book has more to say about other compounds like Magnesium, Calcium, and Bicarbonate, but I don't have that information yet.
Squint and Guess
Now how can I bring my pH down in time to brew this next week? ...I'm planning on brewing an American Brown Ale, btw. : )

Monday, March 19, 2012

Bottling the Acoustic Cream Ale

Yesterday (2012-03-18) I bottled the Acoustic Cream Ale (B5). It was unseasonably sunny and warm here in Central New York State. It was easy to get moving on the days' brewing project. I carried the fermenter from the closet and brought equipment up from the basement. I started boiling my priming solution, poured another cup of coffee, and put on some tunes!


I was eager to see the beer and taste it. During the first week of vigorous fermentation the air lock got clogged with krausen. I emptied the airlock three times. Each time, I was careful to clean and sanitize everything. However, creating even a minute chance of contamination is enough to cause some anxiety. As you can see in the image below, the top of the beer was not entirely cleared up. Most of it did clear after the lid was open for awhile. I took a sample and checked the gravity. The target final gravity, according the recipe, is 1.009, and mine was 1.010. 

Final Gravity: 1.010
A 2 liter yeast starter can make a mess!
The beer sample tasted good. It definitely did taste like a Genesee Cream Ale, with a hint of noble hop character (from the Liberty hops). The beer was still a bit cloudy.
Preparing my equipment
Much of the bottling activities occurred without incident. I did want to cool my priming solution a bit more before dumping it in the bottom of the bottling bucket, but I'm sure all that beer cooled it down. I had an extra gallon of beer, so it took a little longer to siphon out. After filling the two cases, I also filled 2 bombers, 2 12 ounce bottles, and my 32 oz growler! I figured I would drink some un-carbonated; the sample tasted alright. You can see a glass of it in the image below. I managed to get a couple glasses down before wincing and calling it quits. With the sugar-water priming solution, it tasted a little sweet. You can also see how cloudy to is. 
Cloudy, sweet, un-carbonated Cream Ale
The cloudy beer caused me to do a little research. Was the beer going to clear up during bottle conditioning?  I think the answer is yes, it will clear. The yeast will go back to work on the sugar I added, add CO2, then flocculate. And if that is not enough, a week or so in the fridge will clear the beer and firm up the yeast cake on the bottom of the bottle. Had the gravity not been so low, I would have let the beer sit in a secondary for another week. But I think it's fine. The yeast just needs more time to clear up the beer. As far as I can tell, this beer is doing fine.

Thursday, March 8, 2012

Acoustic Cream Ale

Brew Date: 2012-02-26
Recipe Name: "Acoustic Cream Ale" (based on Jamil's "Weed Feed and Mow")
Beer Style: Cream Ale
Batch Number: B5

This beer got its name because I spent the day listening to two acoustic Widespread Panic shows. Also, because the cream ale style strikes me as a down-to-earth, no-frills style, as opposed to electric and in-your-face like an IPA. Finally, the name just sounds good.

Expected Original Gravity: 1.050
Expected Final Gravity: 1.009
Expected ABV: 5.4%
IBUs (bitterness): 18
SRM (color):
Expected Efficiency: 70%
Actual Brewhouse Efficiency: 85%?

Yeast Starter Size: 2 liter
Water Volume: 2 liters
Dry Malt Extract: 200 grams
A vial of White Labs WLP001 California Ale Yeast
Grain Bill
  • 4.75 lbs of German Pilsener Malt
  • 4.75 lbs Canadian Two-Row
  • 1.0 lbs flaked maize
  • .75 lbs cane sugar (@ 30 minutes)
This grain is from Heidelberg, Germany!
Brew Day Start Time: 8:20 AM
(an acoustic show)

Mash
Strike Water Volume: 3.3 gallons
Strike Water Temperature: 165 F
Target Mash Temperature: 149 F
Actual Mash Temperature: 149 F
Mash Time: 60 minutes

Sparge #1
Sparge Water Volume: 2.5 gallons
Sparge Water Temperature: 155 F to 150 F
Mash Time: 20 minutes

Sparge #2
Sparge Water Volume: 2.75 gallons
Sparge Water Temperature: 149 F
Mash Time: 20 minutes

Pre-Boil Gravity: 1.050
Pre-Boil Volume: about 7 gallons
Wort
Boil Time: 60 minutes
(an acoustic show)

Hop Additions
  • .1 oz Liberty @ 60 min
  • .5 oz Liberty @ 1 min
Original Gravity: 1.052
Brew Day End Time: 1:34 PM

I ended with 6 gallons of wort in the bucket, which is too much, as I later found out.

Fermentation Temperature: 60 F for 24 hours, 65 F after

The stopper was bubbling within 8 hours. The stopper filled with yeasty krausen during the week and I emptied and cleaned with sanitized water three times.

We saw three deer looking for the mash grain a half hour after it was dumped in the compost pile. This was in the middle of the day!
Hard to see, but there are three deer down there
Costs
Grain: $1.79 (minus my base malt purchase)
Hops: $3.78
Yeast: $6.99
Other: $7.99 for shipping
Total: $12.56

I should note that I did stock up on StarSan (8 oz) and bottle caps (144 count) too. Together, they cost $11.74 ($7.99 plus $3.75, respectively).

Saturday, March 3, 2012

Tasting March Haters Ale

This last weekend I finally opened a bottle of my March Haters Ale (B4), an American Pale Ale based on Jamil Zainesheff's recipe from his Brewing Classic Styles book.

As you may recall, this was my first all-grain brewed beer, which means that I milled the American two-row and German Munich barley and I mashed the grain to convert starches. All-grain brewing takes longer but gives the brewer more control of the beer and tends to produce better tasting results.
Foamy
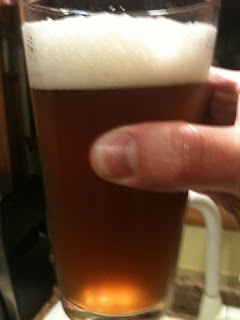
Appearance: The beer has caramel color. The bottle I opened had ample carbonation. I had to pour, wait for the head to fall, then pour some more. I've noticed that some beers have a lot of carbonation and other don't have much. Maybe the sugar-water mixture I use to prime my bottles is not evenly dispersed.

Aroma: Smells much like the fruit flavors in the taste.

Flavor: The flavor is rather smooth; there is no harsh bitterness. The malt flavor is balanced by the hops, but the hops do not have a strong presence. I taste some grape, plum, or apple flavor. The taste ends with a malty coffee flavor as opposed to an earthy or citrus hop flavor.

Mouth feel: The beer has a good medium body. It is not thin or watery. Decent carbonation. As it warms, the liquid seems to thicken.

Overall: The beer is my best so far. No off-flavors or astringency. The beer is more robust and has more complexity. Maybe the beer could have used more IBUs due to the significant grain bill and gravity. I certainly can't fault Jamil's recipe though. I'm sure any shortcomings derive from my beginner mash process, which may have caused the fruit flavors. 
Good American Pale Ale Color