Pints for Prostates

Thursday, January 17, 2013

Brettanomyces Fermentation Photos

Like some craft beer aficionados, I have been interested in sour beers. They are beers that are fermented with wild yeasts such as Lactobacillus, Pediococcus, and Brettanomyces. Several beer styles that use such yeast, like the Lambic beers, were developed in Belgium. Today, the US is seeing a growing interest in such beers and the old-fashioned fermenting processes. 

I continually see beer news stories with images of used whiskey and wine barrels being filled with beer or stacked and lining the walls of concrete cellars. In most cases, the beer is getting the souring and aging treatment. Here are some articles from well-known new sources regarding the interest in sour beers:

The Wall Street Journal - The Sour and the Glory
The New York Times - Brews as Complex as Wine
The New York Times - Sour Beer is Risky Business, Starting with the Name
The New York Times - Brettanomyces, a Funky Yeast, Makes Flavorful Beers *

The Brettanomyces yeast strains are a new frontier for brewers . Brettanomyces is capable of bringing many different flavors to beer, but the knowledge base for this yeast is still young and growing. Chad Yacobsen at Crooked Stave is at the forefront of this exploration with his Brettanomyces Project. It’s an exciting time.

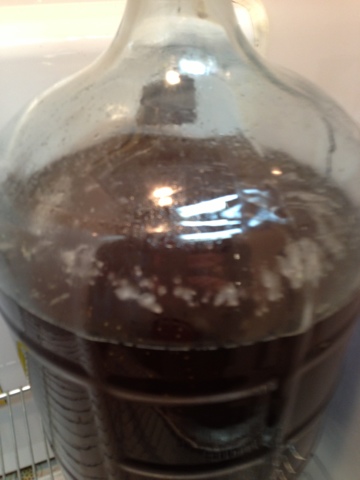
Just after transfer to 5 gallon glass carboy. The foam is StarSan Sanitizer ("Don't fear the foam")


WLP650

Just after pitching yeast.

A couple days later. Weird, aah? A pellicle forms to protect the beer from oxygen.

From above.

Like an alien landscape.

The domes get bigger.

The pellicle thickens.


Tuesday, January 15, 2013

Kingmaker Saison

I named this beer “Kingmaker” after the song of the same name by Big Big Train on their album Far Skies, Deep Time. I was listening to the album on brew day and I liked the name.

The plan for this beer is to use the Wyeast French Saison yeast for the primary fermentation, transfer the beer to a secondary glass carboy and pitch Brettanomyces B. The beer will be in secondary for four to six months. Currently, the beer is a month into secondary fermentation and I’ll make another post about the Brett B fermentation.  
3711 French Saison Yeeast
Brew Name: Kingmaker Saison
Brew Date: 2012-11-21
Batch Number: B12

Recipe Specifics
Batch Size (gal): 5.5
Total Grain (lbs): 13.75
OG: 1.062
Wort Boil Time: 90 min.
Rolling Boil

Grain
11.5 lbs Pilsner
1.5 lbs Flaked Oats
.75 Crystal 60
US Hops - Palisades, Chinook, US Saaz
Hops
.5 oz Palisades @ 60 min
.5 oz Palisades @ 20 min
1 oz Chinook @ 15 min
1 oz US Saaz @ 10 min

Extras
5 ml Lactic Acid
4 grams Epsom Salt
2 grams Calcium Chloride
2 grams Baking Soda
1/2 tab Whirlfloc @ 15 min
1/2 tsp Yeast Nutrient @ 15 min

Yeast
3711 French Saison (in primary)
WLP650 Brettanomyces Brux (in secondary)
Hoppy Kreusan
Mash Schedule
Sacch rest 60 min @ 149 F
15 min @ 149
15 min @ 160
Carboy and Blow Off Tube
Notes
- Inspired by "Saison of Zen," page 26 of Zymurgy, vol 35, no 6, Nov/Dec 2012.
- Would have liked another gallon of starter wort
- To secondary on 2012-12-09 with Brett B.

Thursday, December 20, 2012

Session IPA Recipe

The following is the recipe I used for my Session IPA.

Brew Name: Session IPA #1
Brew Date: 2012-10-14
Batch Number: B11

Recipe Specifics
Batch Size (gal): 5.5
Total Grain (lbs): 9.30
OG: 1.026 (!!)
Wort Boil Time: 60 min.

Grain
4 lbs Maris Otter
4 lbs Canadian 2-Row
1.09 Victory Malt
1 lb Rye Malt
.30 lb CaraPils

Hops
.25 oz Columbus @ 60 min
.5 oz Galaxy @ 20 min
1 oz Palisades @ 15 min
.5 oz Columbus @ 10 min
.5 Galaxy @ 5 min
1 oz Galaxy @ 0 min
.25 Columbus @ 0 min


Extras
5 ml Lactic Acid
2 grams Epsom Salt
2 grams Calcium Chloride
2 grams Baking Soda
1/2 tab Whirlfloc ?
1/2 tsp yeast nutrient ?


Yeast
WLP023 Burton Ale
2 liter starter w/ 200g DME

Mash Schedule
Sacch rest 60 min @ 156 F
No Sparge (!!)

Notes
- Not sure if I added whirlfoc and yeast nutrient.
- Brew day music: Big Big Train - English Eccentric Part 1, Yes - Drama, Fly From Here
- Critical error of no-sparge caused the beer to be under-attenuated and very bitter. I think the recipe is viable, but full sparges and maximum fermentables are needed.
- See the Session IPA Debacle post.

Wednesday, December 19, 2012

Session IPA Debacle

India Pale Ale is my favorite style; that’s what I drink the most. I like a beer with lots of citrus and pine resin hop flavor. A beer with 70 IBUs doesn’t daunt me. Understandably, that is the beer style I like to brew the most. A five gallon Cornelius keg of a tasty IPA is sure to be emptied.

The BJCP style guide has an ABV of 5.5 to 7.5% for IPAs. That doesn’t stop people from making more session-able IPAs (or hoppy blond ales) that have less alcohol, but good flavor. Founders All Day IPA is an example of a session ale with 4.7% ABV. Lagunitas DayTime is another, with an ABV of 4.65%.

This fall I brewed a session IPA. Unfortunately, the beer did not come out well. I created the recipe, but I don’t think the recipe is bad. I think the problem derives from one process decision I made that proved to be a critical mistake.

I had read somewhere that one way to bring down the amount of fermentables in the wort (and therefore get lower gravity) is to just take your first runnings and then add water to get to your pre-boil volume, as opposed to couple batch sparges. That sounded easy and it was sure to cut at least a half hour off my brew day. I didn’t realize the house of cards I was playing with.

After the fact, I can see that this chosen method had a few consequences:
  • The straight water that was added did not get treated with the same water additions (Epsom salts, Calcium Chloride, etc.) as the mash water. That means that my water chemistry and ph was off. The yeast probably wasn’t happy about that.
  • Because I only used the first runnings, the gravity was low; lower than the calculations in my BeerSmith software. To make matters worse, I added about a gallon more water than I needed, which made the gravity even lower. The low gravity meant that the yeast did not have as much fermentables to grow on. Again, the yeast was not happy. The carboy had extra yeast residue on the inside walls of the carboy and on the surface of the beer.
  • The hops that I added were based on a recipe with a certain grain bill and gravity. The lower gravity meant that there were too many IBUs (bitterness) for the resulting beer.
The beer ended up cloudy, yeasty, and bitter. Undrinkable. I tried it each week, and it improved slightly, but not good enough.

It’s a bummer that the beer went bad. But, I can say that I learned something from the experience. I might wait for the sting to wear off some before I try to brew that recipe again.

Monday, December 3, 2012

Ezra Saison Results

...I haven't posted in awhile. I've been brewing, but I haven't taken the time to post on this blog. In my defense, it was a busy and eventful autumn for me and my family. In this post and the next I will do a little "catch up" and share what has been happening, brew-wise.
Ezra Saison Color and Clarity
My last post was about the brew day for the Ezra Saison. That was beer #10 (B10) and I brewed it at the end of August (2012-08-27). As for the results, I consider it one of my best beers so far. I did not document any tasting notes, but I can say that it fit the BJCP guidelines for the Saison style. It was perhaps a bit on the hoppy side of the style. I enjoyed drinking the whole five gallons over several weeks.

For me birthday, Kim took me out to a nice restaurant in the area and I ordered a bottle of Ommegang's Farmhouse Saison, Hennepin. I took one taste and said, "wow, my beer tastes like this." Well, my beer wasn't that good, but it was in the ballpark. Validating experience.

As you can see in the photo above, the gelatin fining I added to the keg helped to clarify the beer. The longer the beer sat in the keg, the more clear it got and the better it tasted.

I wish I had bottled a sample of this beer. The beer improved over time. I have since bought some oxygen absorbing bottle caps so that I can bottle a six pack sample of each future brew. I'll be able to open one bottle and decide whether or not to send the beer to a competition.

Plan to post about my Session IPA experience soon.   : )

Tuesday, September 18, 2012

Ezra Saison

To conclude the summer of Belgian beers, I brewed a Saison on 2012-08-27. I used Jamil Zainesheff's Raison D'Saison recipe in his Brewing Classic Styles book. My recipe deviated some. I added fresh lemon thyme from our garden, chamomile flowers, and crushed coriander. My hop additions deviated some too.

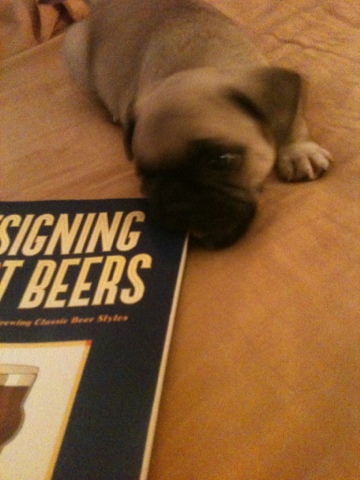
The beer is named after our new French Bulldog/Pug ("Fug") puppy, Ezra. Hopefully the beer will be good enough to represent such a cute puppy. If not, I'll name some other beer after him. He's my new brew buddy. He's already very fascinated about the beer ingredients and brewing process (when he's not napping). You can see in the photo below that he wanted to eat help me design a beer. 
Ezra wants to design a beer recipe (I think)
I want to use a new format for describing my brew day data. It's loosely based on the format used on the Mad Fermentationist blog.

Ezra Saison

Recipe Specifics
Batch Size (gal): 5.5
Total Grain (lbs): 11.76
OG: 1.052
Wort Boil Time: 90 min.

2 liter starter

Grain
10.5 lbs Pilsner malt
.51 lb wheat malt
.75 lb Munich malt
67 g Caramunich

Hops
1.0 oz Hellertau (3.8 AA) @ 90 min
1.0 oz Hellertau @ 42 min
1.0 oz Hellertau @ 0 min

Extras
1 g lemon thyme @ 5 min
5 g chamomile flowers @ 5min
11 g crushed coriander @ 5 min

1/2 tab Whirlfloc
1/2 tsp yeast nutrient

Yeast
Wyeast 3711 French Saison

Mash Schedule
Sacch rest 90 min @ 147 F
Sparge 1 20 min @ 147 F
Sparge 2 15 min @ 150 F

Notes
Made a 2 liter starter (2012-08-26). 117 g of DME (I was short on DME). About 3 tbsp sugar added. Shook a few times. Decent, but not great start.

First brew day with Ezra. He liked the spent grains.

FG: 1.004 on 2012-09-18  
Ezra eating handful of spent grains

Friday, August 31, 2012

Review: BeerClings

Some people like to label their home-brewed beer. A friend of mine makes wine with his wife. Together, they design colorful and clever labels on the computer for each of their wines. For them, the label making is part of the process and part of what they like about making wine at home. But many people are not like that. Designing, printing, and applying (don't forget removing) labels can add hours to the overall process. And, while there may not be a lot of wine bottles to fill per batch, a typical 5 gallon batch of home-brewed beer requires at least 48, 12 ounce bottles, which means that beer labels require more effort. Honestly, I never put labels on my bottles. Bottling, as opposed to kegging, is labor intensive enough.

One option for homebrewers that bottle and would like labels is BeerClings. BeerClings are reusable labels for beer bottles. Homebrewers can easily slap these on their bottles of homebrew. As it states on the product's website, "BeerClings are an exciting answer to the tedious labeling process undertaken by home brewers." I think that statement is accurate.

To test the BeerClings and get a feel for how well they work as advertised, I did the following:

  • I put the labels on two different sized bottles. The labels fit on both.
  • As you can see in the photo, I was able to mark the bottles with dry erase marker. To test this feature, I used a damp paper towel to remove my writing, and then write new words on the label. It worked fine, no problems. 

BeerClings on Bottles
  • I put a label on a beer in the refrigerator and left it there for a couple weeks. The label adhered fine. I took it out of the refrigerator and made sure the label did not come off in the condensation. No problems. The hold was solid.
A Sheet of BeerClings
The BeerClings definitely cling. They are easy to take off and reapply. The maker stated that he "went through a lot of material and the one [he] settled on blew the others away." I believe it.

Unfortunately, there is just one design at the moment. The maker wants to have labels for every beer style eventually.

The cost is $5 for a sheet of 12.

I was impressed by how well the BeerClings worked. I recommend them!

Website: BeerClings.com

Friday, August 3, 2012

Belgian Pale Ale

I was planning on brewing on Sunday. For me and my family schedule, Sunday is a good day to fill the kitchen with brewing equipment, turn on music, and boil water/wort.

However, this Sunday I just wasn't feeling it. Brewing requires a lot of physical and mental energy and approximately five, contiguous hours of time. I was tired. I wanted to sit in the sun and read. I figured that if I pushed myself to brew I would not enjoy it as much, and I don't want to risk associating a poor experience with a hobby that I enjoy.

Arguably, it's possible that I could have started to brew and found myself enjoying the act of measuring grain to mill, stirring the resulting grist in the mash tun, or the pungent aroma of the first, bittering addition of hops to the rolling boil of brown wort.
UK Kent Goldings
Wort


...Not only is it possible, it's likely.

But there are other days to brew.  I ended up brewing on Tuesday (2012-07-31) after work. I knew that with some time to listen to a couple episodes of brewing podcasts (e.g., Basic Brewing Radio, Brewing Network's Sunday Session), calculate mash water volume and temperature, and determine mineral additions for the water, I would be eager to get home on Tuesday and brew. I was.

This time, I brewed a Belgian Pale Ale. The recipe is from Jamil Zainasheff's book, Brewing Classic Styles.  I followed his Antwerp Afternoon recipe, with minor deviations. My version is as follows:

11.3 lbs. German Pilsner malt
.75 oz. CaraMunich malt
4 oz. Belgian Biscuit malt

5 ml of Lactic Acid to mash
2 g of Calcium Chloride to mash
4 g of Epsom Salt to mash
2 g of Baking Soda to mash

1.3 oz. UK Kent Goldings @ 60 min.
1/2 tablet of Whirlfloc @ 15 min.
.25 teaspoon of yeast nutrient @ 15 min.
.7 oz. UK  Kent Goldings @ 0 min.

2 vials of White Labs WLP500 Belgian Ale yeast

1 oz. UK Kent Goldings dry hop in keg 

WLP500 Belgian Ale Yeast
If you have the book you can follow along with me. I am working my way through his Belgian and French Ale chapter. I brewed a Witbier at the beginning of July. I brewed a Belgian Pale Ale on Tuesday. Next, I will brew a Saison. I might brew a Biere De Garde too, we'll see. We can dub this the "Belgian Summer." It's also a means to use the large sack of German Pilsner base malt I have in the basement.

How did this get to be the summer of Belgian beers?

The Witbier was definitely for Kim. She likes the style and I wanted to make a beer that would have her sneaking downstairs to draw from the keg each evening. I have not written a review yet because, at this point, the beer is a bit green. I'm hoping the harsh flavors mellow and that the overall flavor improves. It's certainly drinkable, but not great.

I think the pint of BPA I had at Ommegang inspired this beer. I think that beer is fantastic. Besides, I have brewed a couple American Pale Ales already. Why not compare the brewing experiences and beer styles?

As I understand it, Saisons can be herbal, hoppy, and tangy. The style is supposed to be quite flavorful and a good pairing for many foods. It is a good base beer with which to experiment with herb and fruit additions. I would like to learn more about Saisons, both by reading about the style and by tasting more examples.


If I brew the Biere De Garde, I think the strong, malty profile will make for a good winter beer (the beer needs to be lagered for three months). As you can tell, I'm not sure I will brew it. I might find myself really wanting to make an IPA by then. 

Friday, July 13, 2012

Summer Witte

On July 2nd I brewed a witbier, a Belgian style beer brewed with wheat. The commercial examples use terms like "Belgian white" (e.g., Hoegaarden, Blue Moon) or "witte" (e.g., Ommegang Witte). It's a light golden but hazy beer with coriander and citrus flavors that are refreshing during the summer months.

Kim really likes Ommegang's Witte and wanted me to brew a witbier for her, and I was happy to oblige. Knowing that the beer requires warm fermentation temperatures, I held off on brewing it until summer.

I'm calling this beer, "Summer Witte." I brewed the beer at the beginning of July, it will ferment and carbonate during July, and we'll be able to drink the beer throughout August.

I was surprised by how excited I was about this beer. My wide-eyed glow came from the seasonings and hop additions that the recipe calls for. This beer has crushed coriander seeds, chamomile flowers, and orange zest. I opted to purchase whole leaf hops for the first time, which provided a sense of brewer tradition and aesthetic value. I was also happy with the yeast selection: two vials of White Labs WLP410 BelgianWit II - Platinum, a spicier version.
Hops, Coriander, Chamomile, Orange Zest
Kim helped me pick out the extra ingredients at the health food store. She crushed the coriander seeds and helped zest the oranges, which was no small job, six oranges total.
Zesty!
Brew Date: 2012-06-02
Recipe Name: "Summer Witte" (based on a Jamil's Wittebrew recipe)
Beer Style: Witbier
Batch Number: B8

Original Gravity: 1.050
Expected Final Gravity: 1.011
Expected ABV: 5.0%
IBUs (bitterness): 22.4
SRM (color): 4 SRM

Yeast: 2 vials of White Labs WLP410 Belgian Wit II

Water Chemistry: Remsen well water (Ca 84, Mg 10, Na 3, Cl 8, SO412, CACO3 228)
Added: 6 ml Lactic Acid, 3 g Epsom Salt, 1 g Calcium Chloride (to mash)

Recipe
5.5 lbs. German Pilsner
5.0 lbs. Flaked Wheat
.25 lb. Munich Malt
.5 lb. rice hulls

1.2 oz. Hallertau (leaf) @ 60 min.
.8 oz. Hallertau (leaf) @ 15 min.

1.3 oz. orange zest @ 5 min.
.4 oz. crushed coriander seeds @ 5 min.
.03 oz dry chamomile flowers @ 5 min.

1/2 tablet of Whirlfloc @ 15 min.
.25 tsp. yeast nutrient @ 15 min.
Flaked Wheat
Mash Schedule: 
> 15 min. @ 122 F
> rise from 122 to 154 F over next 15 min.
> 60 min. @ 154 F
> sparge @ 160 F for 15 min.
> sparge @ 170 F for 15 min.

Note: I was short about a gallon of water for my pre-boil volume.
Mash Music: Bon Iver iTunes Session, Phish Superball IX @ Watkins Glen 2011-07-03 (I should have listened to the 07-02 show!)

Boil Time: 90 minutes to reduce DMS
Boil Music: Brewing Network's Sunday Session podcast 2010-01-17 (Vinny from Russian River episode)
Whole Hop Boil
One of the process changes I made to this brew day was to siphon the wort form the brew kettle to the fermenter. I did that to reduce the amount of whole leaf hops in the fermenter. I used a lot of plastic wrap to reduce exposure. After, I managed to break my auto-siphon trying to get a hop leaf out of it. This is a typical problem apparently.

Fermentation Schedule: 
> 1 week @ 68 F
> 1 week @ 70 F
> 1 week @ 72 F

Wednesday, July 4, 2012

Tasting Free IPA

I've been drinking my Free IPA for over a week now. I'm really happy with it. All the research and changes to my brewing process definitely improved the resulting beer.
Free IPA
The beer is not as clear as I would like, despite the Whirlfloc tablet and cold crash period. I plan to use gelatin finings next time. The color is spot on.

When I first kegged the beer it had a brilliant grapefruit aroma. After a week of force carbonation with CO2, that aroma is more subdued, but still present. 

Does it taste like the inspiration beer (i.e., 21st Amendment's Brew Free or Die IPA)? I didn't do a taste test, but I can say that it is close. The beer has lots of hop flavor and little bitterness. 
Corny Keg and CO2 tank
Apart from the water chemistry changes, the other big change was the use of a Cornelius keg. I bought a keg from a friend, purchased and assembled all the hardware, and got a 15 pound CO2 tank. And, yes, I also bought a used refrigerator to put it all in. At some point I may drill holes and turn it into a proper kegerator.

I'm sure there will be a learning process for using and cleaning the keg. In general, racking the beer to a keg and force carbonating the beer is much easier than bottling.

Because the beer is cooled to 45 to 47 degrees Fahrenheit, I force carbonate at 14 psi.

I found the Crockett Brewing pages on Easy Force Carbonation and Balancing your Keg System to be helpful. 

Friday, June 22, 2012

Brewery Ommegang

A couple weeks back, Kim and I took a road trip to Cooperstown, New York to tour Brewery Ommegang. The brewery makes some of the best Belgian style beers here in the States and worldwide. I'm sure I could go on and on about the brewery and the beers (I highly recommend them), but I'm just going to post some pictures and comment.
Ommegang Farmhouse
Ommegang was built in the 1990s but the design is that of a traditional Belgian farmhouse.

We checked in at the gift shop to sign up for the next tour and purchase tasting tickets ($3/person). We had a short wait so we went to the cafe/bar.
Cafe Ommegang
Fermentation is pretty awesome.
Beer, wine, bread, pickles, cheese, fish sauce, sake, yogurt, sauerkraut, vodka, etc.
Belgian (style) breweries:
Ommegang, Maredsous, Duvel, Liefmans, Brasserie  D'Achouffe
Belgian Pale Ale and cappuccino 
Cheers!
Tasting Ommegang's Belgian Pale Ale, fresh from the tap at the brewery, may have been the high point of the day for me. Really! We could have left right then and I would have been happy. I've had the BPA before, but it didn't taste like this. So much flavor. It even seemed like it had a slight barnyard Brett flavor (I'm fairly certain no Brettanomyces was used), which I loved and I hope I never forget.
Our tour guide in front of bottling equipment
The half hour tour was good. The brewery is fairly small. Our tour guide talked about how beer is made, the fermentation, and bottling. They have a clean room with an open fermenter. The beer ferments at 75 F!

After the tour, our guide led us to the tasting room. He put pretzels and various cheese spreads and sauces on the counter. We sampled all six of the Ommegang beers, from lightest (Witte) to darkest (Three Philosophers). The tour guide described each of the beers and the special herbs and spices added to each (I guess the Belgians didn't buy in to the whole Reinheitsgebot thing).
Herbs and Spices
After the tasting, we asked to be seated outside to enjoy a Sunday afternoon lunch/dinner. We had rain showers on and off that day, but luckily it held out long enough for us to eat and enjoy glimpses of the sun.
Outdoor seating
Smiling
and a little red after the tasting
Hennepin ,a farmhouse Saison
Witte, a Belgian style wheat ale, or witbier
Checkout this menu!

Frites (twice-fried fries) with two sauces:
1) Abbey Ale and cumin ketchup and 2) Mustard with Witte Ale and honey
Moules Witte (mussels in Witte broth and Shiitake mushrooms)
Crepe with spinach and goat cheese
Crepe with duck confit and Shiitake mushrooms
Obviously, the meal was stunning. Visually appealing, good execution, and lots of flavors. Very enjoyable. Not too expensive either (though watch yourself when you pass back through the gift shop--that can get expensive, trust me).

I recommend visiting Brewery Ommegang for your own Upstate New York flavor adventure. And if you can't make it, look for their beers. All six are excellent representations of their respective beer style. Rather than a bottle of wine, pick up a bottle of Ommegang to take to your friends house for dinner. Cheers!
Ommegang Abbey Ale and Hennepin

Monday, June 18, 2012

Hop Growing, Take 2

This last Thursday (2012-06-14) I planted two more hop rhizomes. The rhizomes I bought and planted earlier in the spring did not come up. Looking at these new rhizomes--which I bought from Freshops this time--are sturdier, healthier and more robust than the weak little twigs I had before. That difference in quality gives me hope that these will indeed shoot out of the soil, climb themselves up the guide wire, and dangle those cirtrusy cones of hop goodness in front my nose.
Centennial Tag
The new rhizomes are both Centennial hops. Centennial is one of the "Three C" hops of American hops (the other two being Cascade and Columbus). It has a floral and citrus flavor and aroma with a 9 to 12% Alpha Acid. The pungent flavor and Alpha Acid rating causes the hop to be described as a Super Cascade hop. It can be used for bittering and flavor (i.e., dual-purpose). Great for Pale Ales and India Pale Ales--my favorite.
Waiting
Many great beers use Centennial as the flavoring addition. Stone's Ruination IPABell's Two Hearted Ale, and Founders' Centennial IPA are just a few examples. My Free IPA, a clone of 21st Amendment's Brew Free or Die IPA uses Centennial as the 20 minute, flavoring addition. The near legendary Centennial Blonde recipe my BierMuncher on the HomebrewTalk.com forums features Centennial hops (at the moment, 2318 gallons!! have been brewed by homebrewers--it's on my list). I'm happy with my choice and I hope to use a lot of Centennial hops in the future.

Monday, June 4, 2012

Free IPA

As cliche as it might be among craft beer aficionados these days, I have to say, I love a great IPA. I am always trying new IPAs and adding more to my "best of" list. One of the IPAs that I instantly went gaga over (a total BILF) was 21st Amendment's Brew Free or Die IPA. Great hop aroma, even more hop flavor, and almost no bitterness. A very smooth, late-hop-addition beer. That is what I want.
21st Amendment's Brew Free or Die IPA
A quick search and I was able to find a clone recipe. I do not know how close it is. If you compare that beer recipe to what I list below, you can see that I changed it some because Amarillo and Simcoe hops are hard to come by this time of year. They are both very popular hops. Instead, I added an ounce of Summit hops. Maybe not the best substitution, but whatever. I named the beer "Free IPA," as a reference to the clone beer and to the fact that I brewed it on Memorial Day.

Brew Date: 2012-05-28 (Memorial Day)
Recipe Name: "Free IPA" (based on a 21stAmendment Brew Free or Die IPA clone recipe)
Batch Number: B7

Expected Original Gravity: 1.069
Expected Final Gravity: 1.010?
Expected ABV: 6.2%
IBUs (bitterness): 70
SRM (color): 9.1 SRM
Expected Efficiency: 70%
Actual Brewhouse Efficiency: ?


Yeast Starter
Water Volume: 2 liters
Dry Malt Extract: 200 grams
Yeast: White Labs WLP001 California Ale Yeast
Yeast Nutrient: 1/4 teaspoon of LD Carlson Yeast Nutrient
Note: I forgot and used post-softened water for the starter. The yeast might have liked the pre-softened better.

Water Chemistry: Remsen well water (Ca 84, Mg 10, Na 3, Cl 8, SO412, CACO3 228)
Added: 3 ml Lactic Acid, 6 g Epsom Salt, 3 g Calcium Chloride (to mash)
Brewing Salts and Yeast Nutrient
As you can tell from my previous posts, the last couple months have been about trying to improve my water. With the second water report I was able to use a spreadsheet to determine what ought to be added and how much. To this point I have studied and acted according to what makes sense. Next, perhaps the taste of the beer will suggest what should be adjusted.

Brew Day Start Time: 8:05 AM
Music: Grateful Dead - Rocking the Cradle: Egypt 1978 (1978-09-15,16)
One of the tools I use to track my brew days and recipes (besides this blog) is my 2012 Brewer's Logbook from Basic Brewing. I listen to the Basic Brewing podcast each week and purchasing the logbook was a good way of saying thanks. The logbook has a calender so that I can plan brewing activities and pages to document significant information and notes about each brew day. Like the act of brewing, using a pencil and paper to take notes keeps me away from a computer screen for awhile.
My 2012 Brewer's Logbook
Grain Bill
11 lb Canadian Two-Row
1 lb 12 oz Munich Malt
12 oz Carapils

Mash
Strike Water Volume: 3.5 gal
Strike Water Temperature: 165 F
Mash Rest Temperature: 154 F
Mash Time: 60 min


I stirred the grain more than during previous brew days. It ought to help the conversion. 
Mash
Sparge #1
Sparge Water Volume: 2.0 gal
Sparge Water Temperature: 170 F
Rest Temp: 160 F
Mash Time: 15 min

Sparge #2
Sparge Water Volume: 2.5 gal
Sparge Water Temperature: 170 F
Rest Temp: 160 F
Mash Time: 15 min


I wanted the rest to be at 170 degrees for both sparges. As you can see, the temperature went down 10 degrees. Next time....
Composting Spent Grains
Pre-Boil Gravity: 1.050
Pre-Boil Volume: 5.3 gal (calculated)
Boil Time: 60 minutes (Note: It appears I deviated from the recipe here. The recipe calls for a 90 minute boil)

Hop Additions
1.00 oz Warrior @ 60 min
1.00 oz Centennial @ 20 min 
1.00 oz Columbus @ 0 min 
1.00 oz Cascade @ 0 min
1.00 oz Cascade dry hop @ 3 days
1.00 oz Summit dry hop @ 3 days
1. 00 oz Styrian Goldings dry hop @ 3 days


I should mention that I also added 1 teaspoon of yeast nutrient and 1 half tablet of Whirlfloc @ 15 minutes left in the boil.
Lots of Hops!

All Green and Chillin'
Original Gravity: 1.058
Brew Day End Time: 1:30 PM   

Fermentation Schedule
Week 1: target of 67 F, with incubator set around 18 C
Week 2 and 3: target 67 F, with incubator set to 19.4 C
3 days at 35 F (? still researching what a good cold break temp is)
3 days at 67 F with dry hop, then rack to keg
New Incubator with  Fermenter and Blow-off Tube
This incubator is my new baby. It cools and heats, maintains the temperature I want, in Celsius. This fermentation tank will allow me to brew throughout the summer and keep a consistent temperature. I was able to buy it cheap off of craigslist. (Shout out to my friend Howie for helping me transport it. It was a nice Sunday drive in the sun, windows down, music playing.)